Friday, January 2, 2015

Stampin'Up Perfect Peacock Note card Gift Set


What a great way to start the New Year 2015 by making this fabulous note card gift set project, made with the Stampin'Up Perfect Peacock Stamp set. This is very easy to make and a great gift for all occasions!
The Box Enclosure was designed by Wendy Cranford a very talented Independent Stampin' Up Demonstrator, and you can learn how to make this box by watching her YouTube video tutorial HERE

The note card base measures 5" X 3-1/2.  Cut paper at 10 X 3-1/2 and fold in half. You can use your favorite color card stock, here I used Blackberry Bliss card stock (item #133675) for two of the note cards.
The top layer is Very Vanilla card stock cut at 3-3/8 X 4- 3/4. Also cut another piece of Very Vanilla CS for the inside of card that measures 4-1/2 X 3-1/4. You can leave the top layer square or use one of the Stampin Up border punches to cut bottom of this top layer. I stamped the Perfect Peacock in Blackberry Bliss and added some of the Gold bakers twine to make it a little different.
I used the Birthday Wishes sentiment from the Stampin'Up "Four You" stamp set and embossed this in Gold.
For the second note card I added some dazzling diamonds glitter to feathers of the Peacock and 3 small flowers using the flower in the Itty Bitty Accents Punch Pack (item # 133787). The tiny flower was done with the Itty Bitty Shapes Punch Pack (Retired) if you don't have this punch you can use one of the flower shapes from the Boho Blossoms Punch (item #119858), or add another flower of the same size. I used the "celebrate" sentiment from the Stampin'Up "Good Greetings" stamp set.

For the third and forth note cards I used the Naturals Ivory card stock (item #101849) for the base.
I stamped the Peacock with Tuxedo Black Memento Ink and I used the Stampin Up Ovals Collection framelits dies as follows:
Gold Oval is #6
Black Oval is #5
For Center Oval you can use the Oval #4.
I used the "THANK YOU" sentiment from the Stampin'Up Lots of Thanks stamp set and I used the "CONGRATULATIONS" sentiment from the Stampin'Up Something to Say stamp set.

The Envelopes were made with the Stampin'Up Envelope Punch Board. I did a little change on the dimensions to customize and so the note cards and envelopes fit well inside the box.
To make the Envelopes Cut Paper at 7-1/4 X 7-1/4 and score at 3".

I hope you get inspiration and decide to make your own note card gift sets :)
Thank you for visiting! and Happy Stamping!
Please Click Here to shop for these Stampin' Up items.


Sunday, December 28, 2014

Winter 2014 Gift Set Project


I wanted to share with you another project made with Stampin Up products, I love the versatility of the Wonderful Wreath Framelits dies and of course a mix and match of snowflakes.

 In this project I used the Stampin Up Festive Flurry Framelits to create the three dimensional snowflake on front of Gift Bag. For the Handles I used the Natural 7/8" cotton ribbon (item # 127844).

 To decorate the mason jar lids I used the snowflake die in the Snowflake Card Thinlits Dies set (item # 135855 available until January 5, 2015) cut on Silver Glimmer Paper and one of them in Lost Lagoon Card stock color to layer them and the other one in Soft Sky card stock. The lids are covered with a 2" Circle of All is Calm DSP (item #135823 available until January 5, 2015). I then wrapped a 1/2 inch natural cotton ribbon around the neck of the jars and embellished them with the words "Joy" and "Noel" from the Wonderful Wreath Framelits Dies (item #135851) cut in the Stampin Up Silver Foil sheets (item # 132178), tie these words with the Stampin Up Silver Baker's Twine (item# 132976) to coordinate and blend well with all the embellishments.

I hope you get some inspiration and decide to make your own handcrafted gift sets for your friends and family this season :)
To shop for these items please visit my website HERE.

Saturday, December 27, 2014

2014 Happy Wonderful Christmas Card


I wanted to share with you the 2014 Christmas Card design I selected to send my family and friends.

For the Card Base I used the Stampin'Up Naturals Ivory card stock (item #101849), Cherry Cobbler CS for the outer frame  and Very Vanilla CS for the top layer, this top layer I first stamped with the sentiment on the Wondrous Wreath stamp set using the SU writing makers in Baked Brown Sugar and Cherry Cobbler colors then I embossed this layer using the SU Filigree Frame Textured Impressions Embossing Folder (Item# 135818).

For the Wreath I did the following steps: I used the Wondrous Wreath Stamp Set and stamped wreath image on Very Vanilla CS with Sahara Sand Ink, then I stamped the leaf wreath image on top with Baked Brown Sugar Ink to give it a gold tone look, then I stamped the berry wreath image with Cherry Cobbler Ink, I embellished it with Gold sequins, and the word "Joy" from the Wonderful Wreath Framelits Dies cut in SU Gold Foil Sheet, and attached this word to wreath with glue dots. I added a bow using the Cherry Cobbler Seam binding ribbon and finally attached the entire wreath to the top layer of card with dimensionals.
I hope you like this card design, and I hope you are having a Wonderful Christmas Season!
Thank you for visiting!
To order these Stampin' Up  products visit my website HERE

Stampin'Up Curvy Keepsake Box Christmas 2014


This is another way to decorate your Stampin'Up Curvy Keepsake Boxes for Christmas. 
I used a small piece of  Stampin Up Christmas Designer Paper to cover two of the sides of box, I also used the Festival of Trees stamp set and gold embossed the dots on the tree. I used one of the frames to emboss around the tree. For the bow I used the gorgeous SU gold silk ribbon, and I embellished it with the beautiful words "Joy" and "Noel" from the Wonderful Wreath Framelits Dies, I cut these in the Stampin Up Gold glimmer paper.

To order these products visit my website Here


Wednesday, December 17, 2014

Stampin'Up Music theme Card

 I wanted to share with you this Music Theme Card I made for my daughter's Piano teacher, I used the SU Modern Medley music sheet DSP (retired) and I wanted to incorporate a red flower to coordinate not only with the Card but also with the Christmas season, so I voted for the latest and greatest Stampin'Up Flower Frenzy Bigz Die in SU Cherry Cobbler card stock, I sponged edges with Early Espresso Ink and assembled the flower by layering each piece with a dimensional on the center, I used a black marker to draw the piano keys on whisper white card stock and cut the black keys separately and attach them with dimentionals as well. I also free hand drew the piano tail on Basic Black card stock. For the sentiment I used the label from Project Life Cards and Labels framelits.

Monday, December 15, 2014

Christmas 2014 Stampin'Up 3D Projects

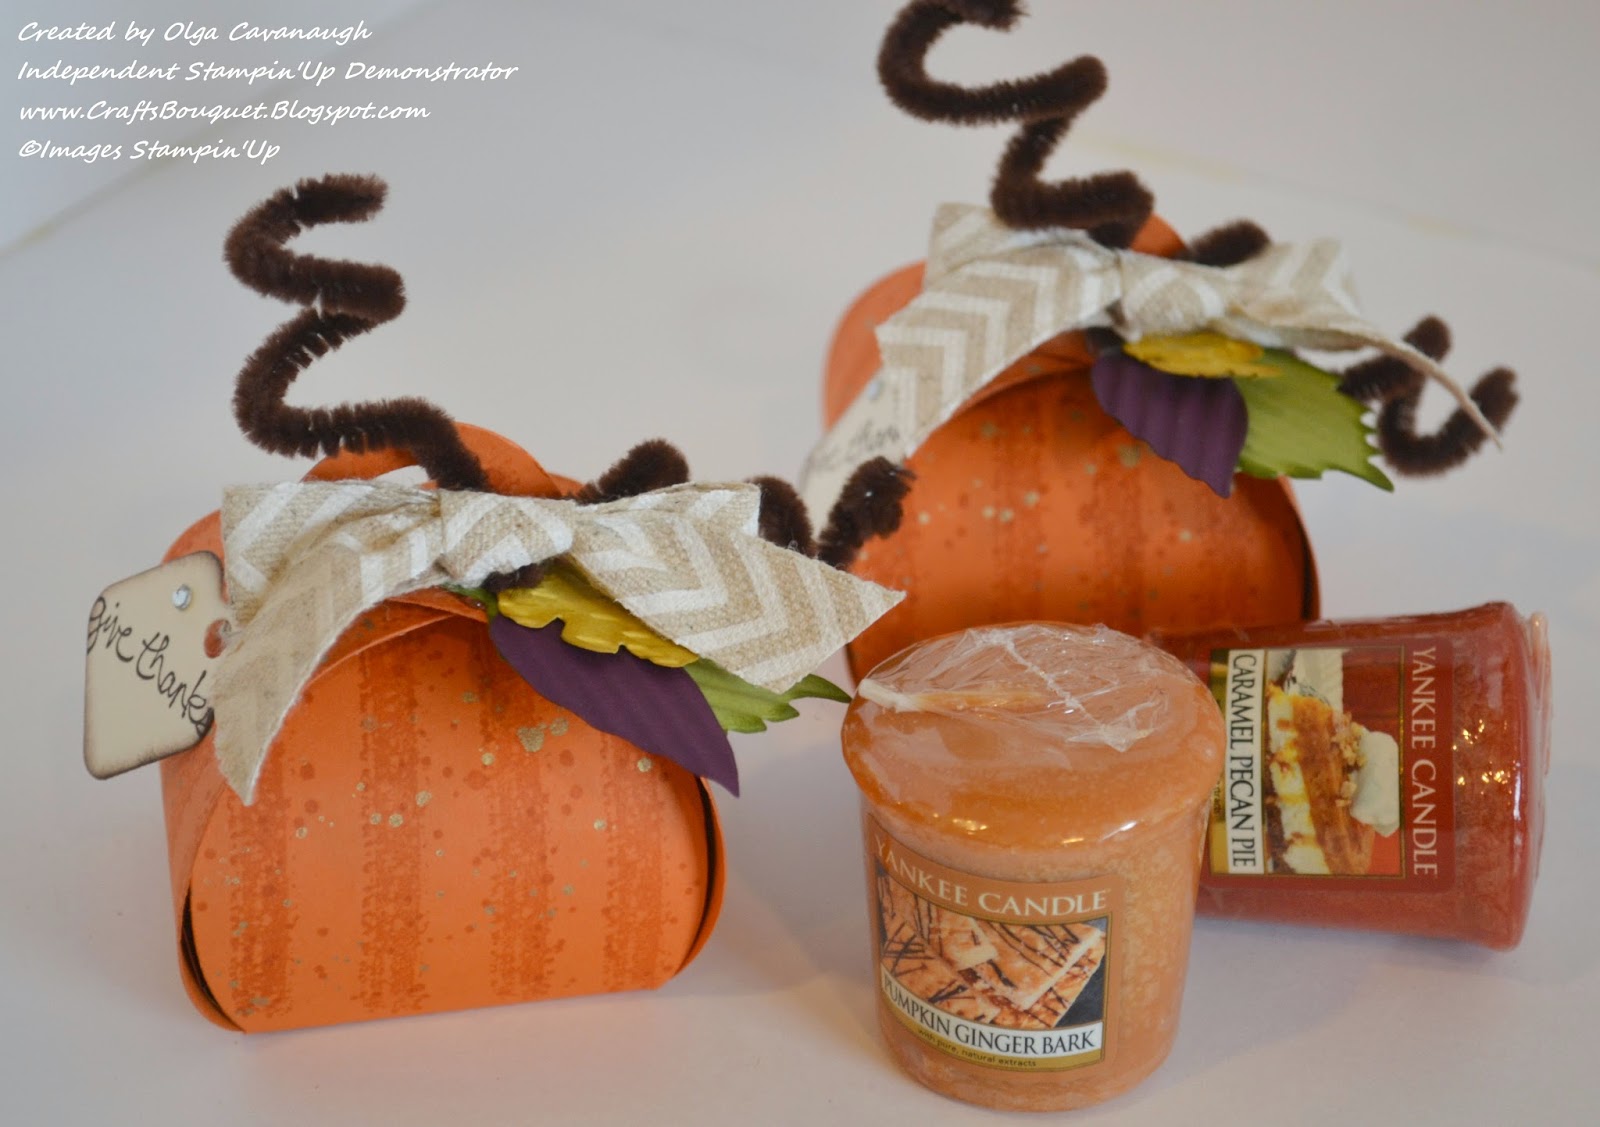
These are some of the Stampin Up Projects I have been working on during the 2014 Thanksgiving and Christmas Season, these projects are so easy and so much fun to make.

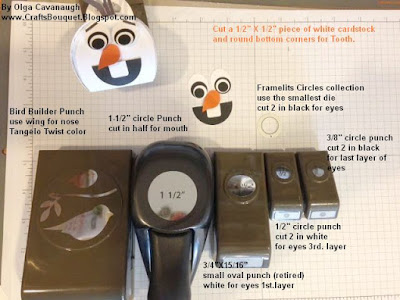
These are the punches I used to build the Olaf 's face, some punches are retired now but you can always substitute for another punch, die, or framelit of similar size.

Gift Bag made with a 12 x 12 piece of DSP


December 2014 Gentle Peace Christmas Card


 The color Card Stock and Ink for this card is Lost Lagoon.


The color card stock and Ink for this card is Pool Party

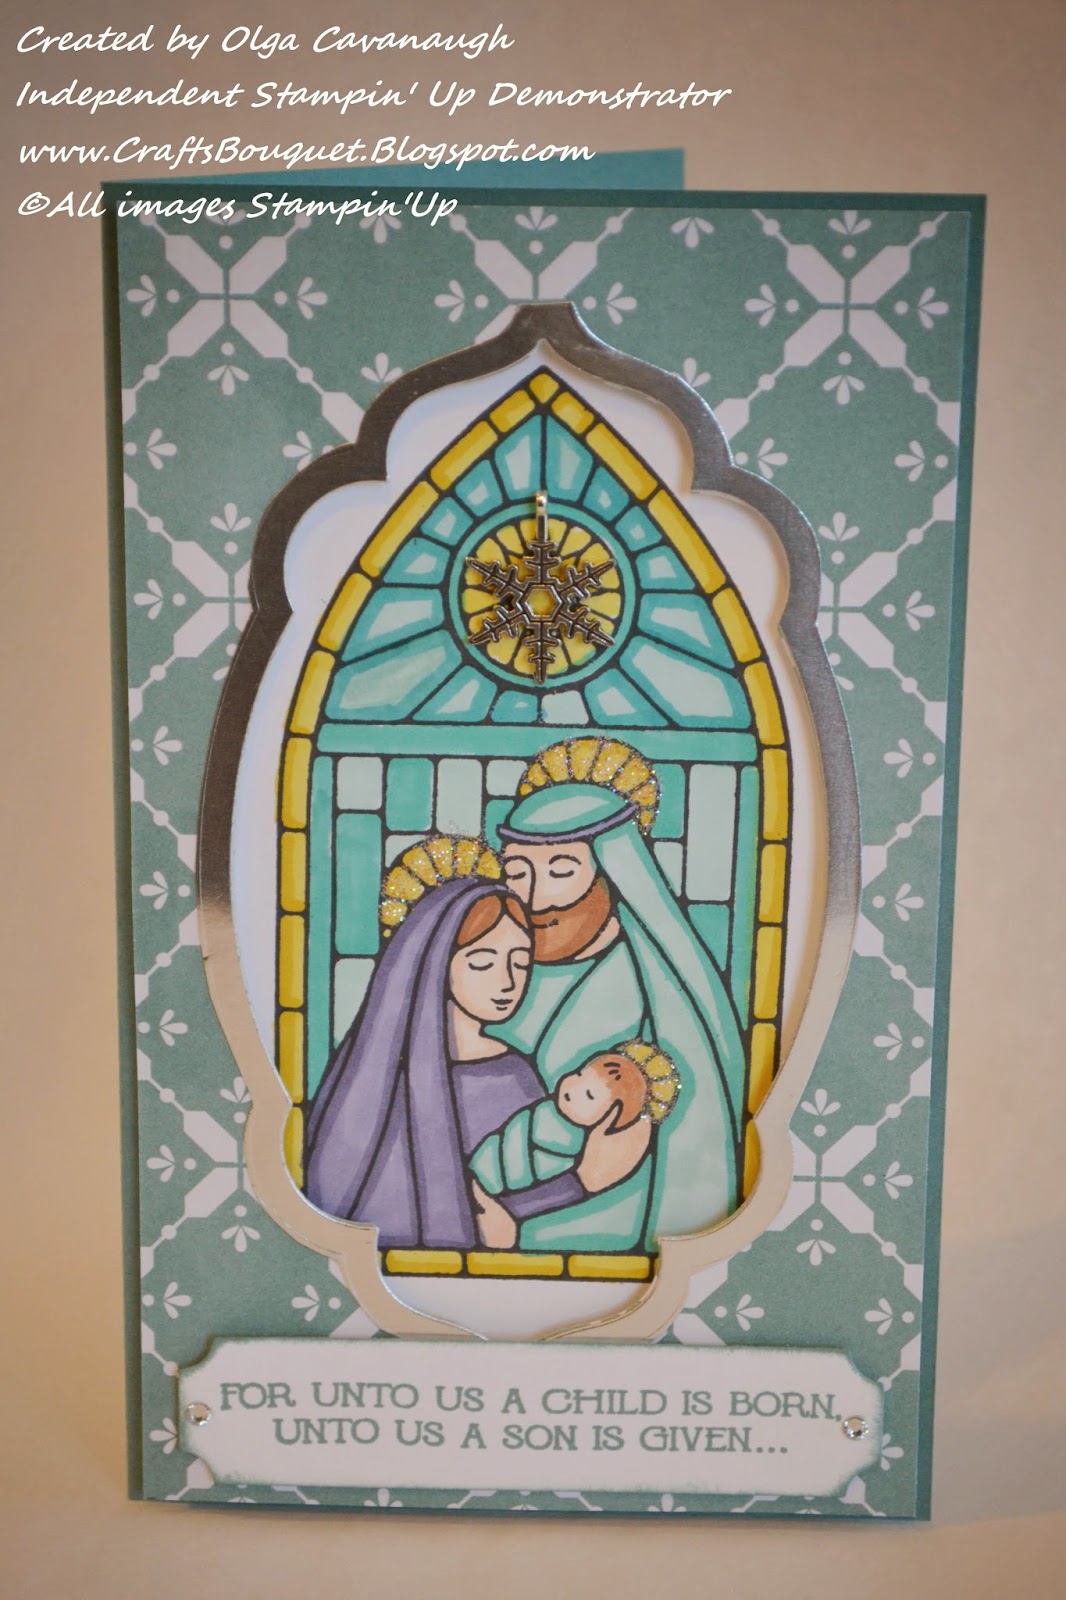
I wanted to share with you my December 2014 Christmas card. I used the Gentle Peace Photopolymer Stamp set, I stamped the image with Tuxedo Black Memento Ink then I colored it using the light and medium of the Blendabilities markers. I also layered it using the All is Calm DSP, I die cut this piece with one of the SU Apothecary framelits dies and added a border with same framelit die and fussy cut 1/8 of an inch with scissors to create the window frame on a piece of Stampin'Up Silver Foil sheet. For the sentiment I used the label from Project Life Cards and Labels Framelits which fits perfect with the sentiment on this stamp set. To embellish it I added some of the Dazzling Diamonds glitter on the Halos only and  I used one of the coordinating All is Calm Snowflake embellishments and placed over the star on the window image, these embellishments are on our Holiday Catalog available until January 5, 2015.
I hope this post will help you and bring you some inspiration to create your own,
Write me a comment or if you have any questions.
Thank you so much for visiting and May God Bless you during this Holiday Season.

To Shop for any of these products please go to my Stampin Up web page Here.